Why Contact Properties?
Before contact properties, the only way to attach custom data to a contact was through unstructured text fields. This worked, but had significant downsides:- No consistency — One team member might write “yes”, another “true”, another “ja”
- No validation — Typos and formatting mistakes went unnoticed
- No structure — You couldn’t filter, sort, or report on free-text fields reliably
Property Types
telli supports the following property types, each with its own input and validation:| Type | Description | Example Value |
|---|---|---|
| Text | Free-text string | ”Enterprise” |
| Number | Numeric value | 42 |
| Boolean | Yes or No | Yes |
| Date | Calendar date | 2025-03-15 |
| Date & Time | Calendar date with time | 2025-03-15 at 14:30 |
| Select | Single choice from a predefined list | ”Gold” |
| Multi-Select | Multiple choices from a predefined list | ”German”, “English” |
| Phone Number | Phone number in international format | +49 172 1234567 |
| Email address | [email protected] |
Tip: Choose the most specific type for your data. For example, use Date instead of Text for dates — this ensures proper validation and a better editing experience in the contact details panel.
Create Your First Property
1. Navigate to Settings
Head over to Settings and select the Properties tab.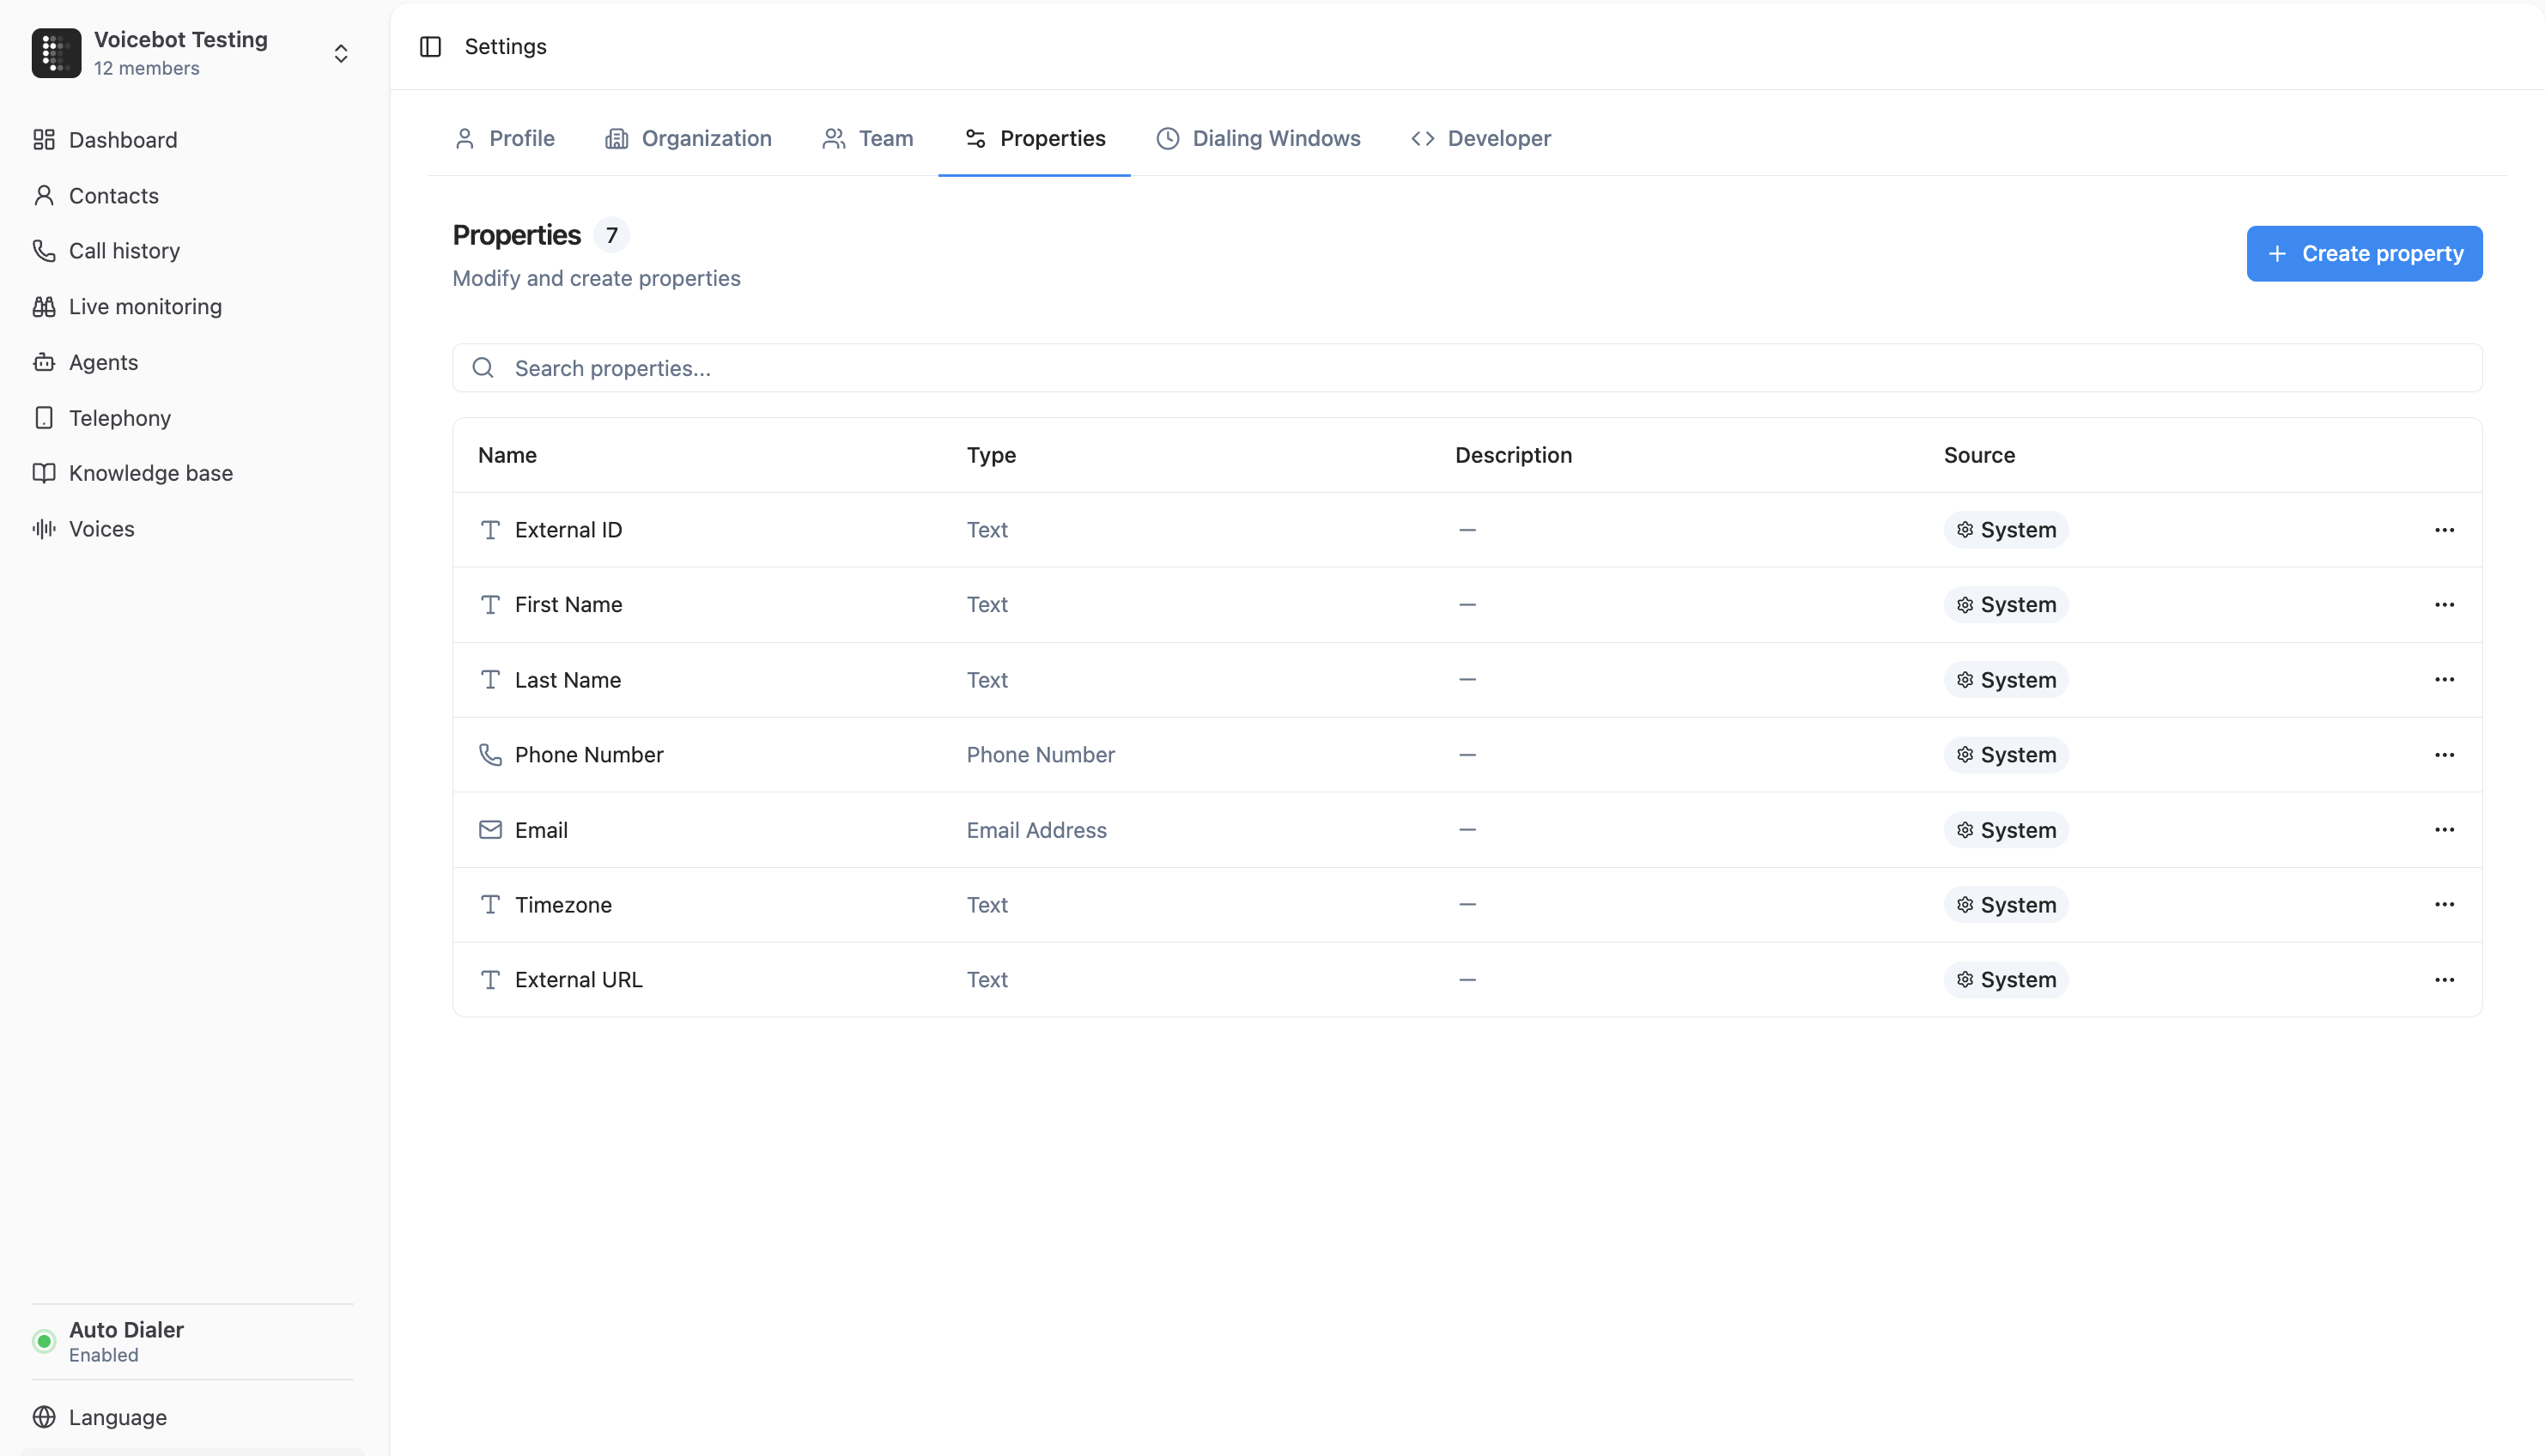
2. Click “Create Property”
Click the Create property button to open the property editor.3. Configure the Property
Fill in the details for your new property:- Type — Select the data type (e.g. Text, Select, Date)
- Name — Give it a clear, descriptive name (e.g. “Lead Source”)
- Description (optional) — Add a note to help your team understand what this property is for
4. Add Options (Select & Multi-Select only)
If you chose Select or Multi-Select, you’ll need to define the available options. Simply type the option name and press Enter to add it.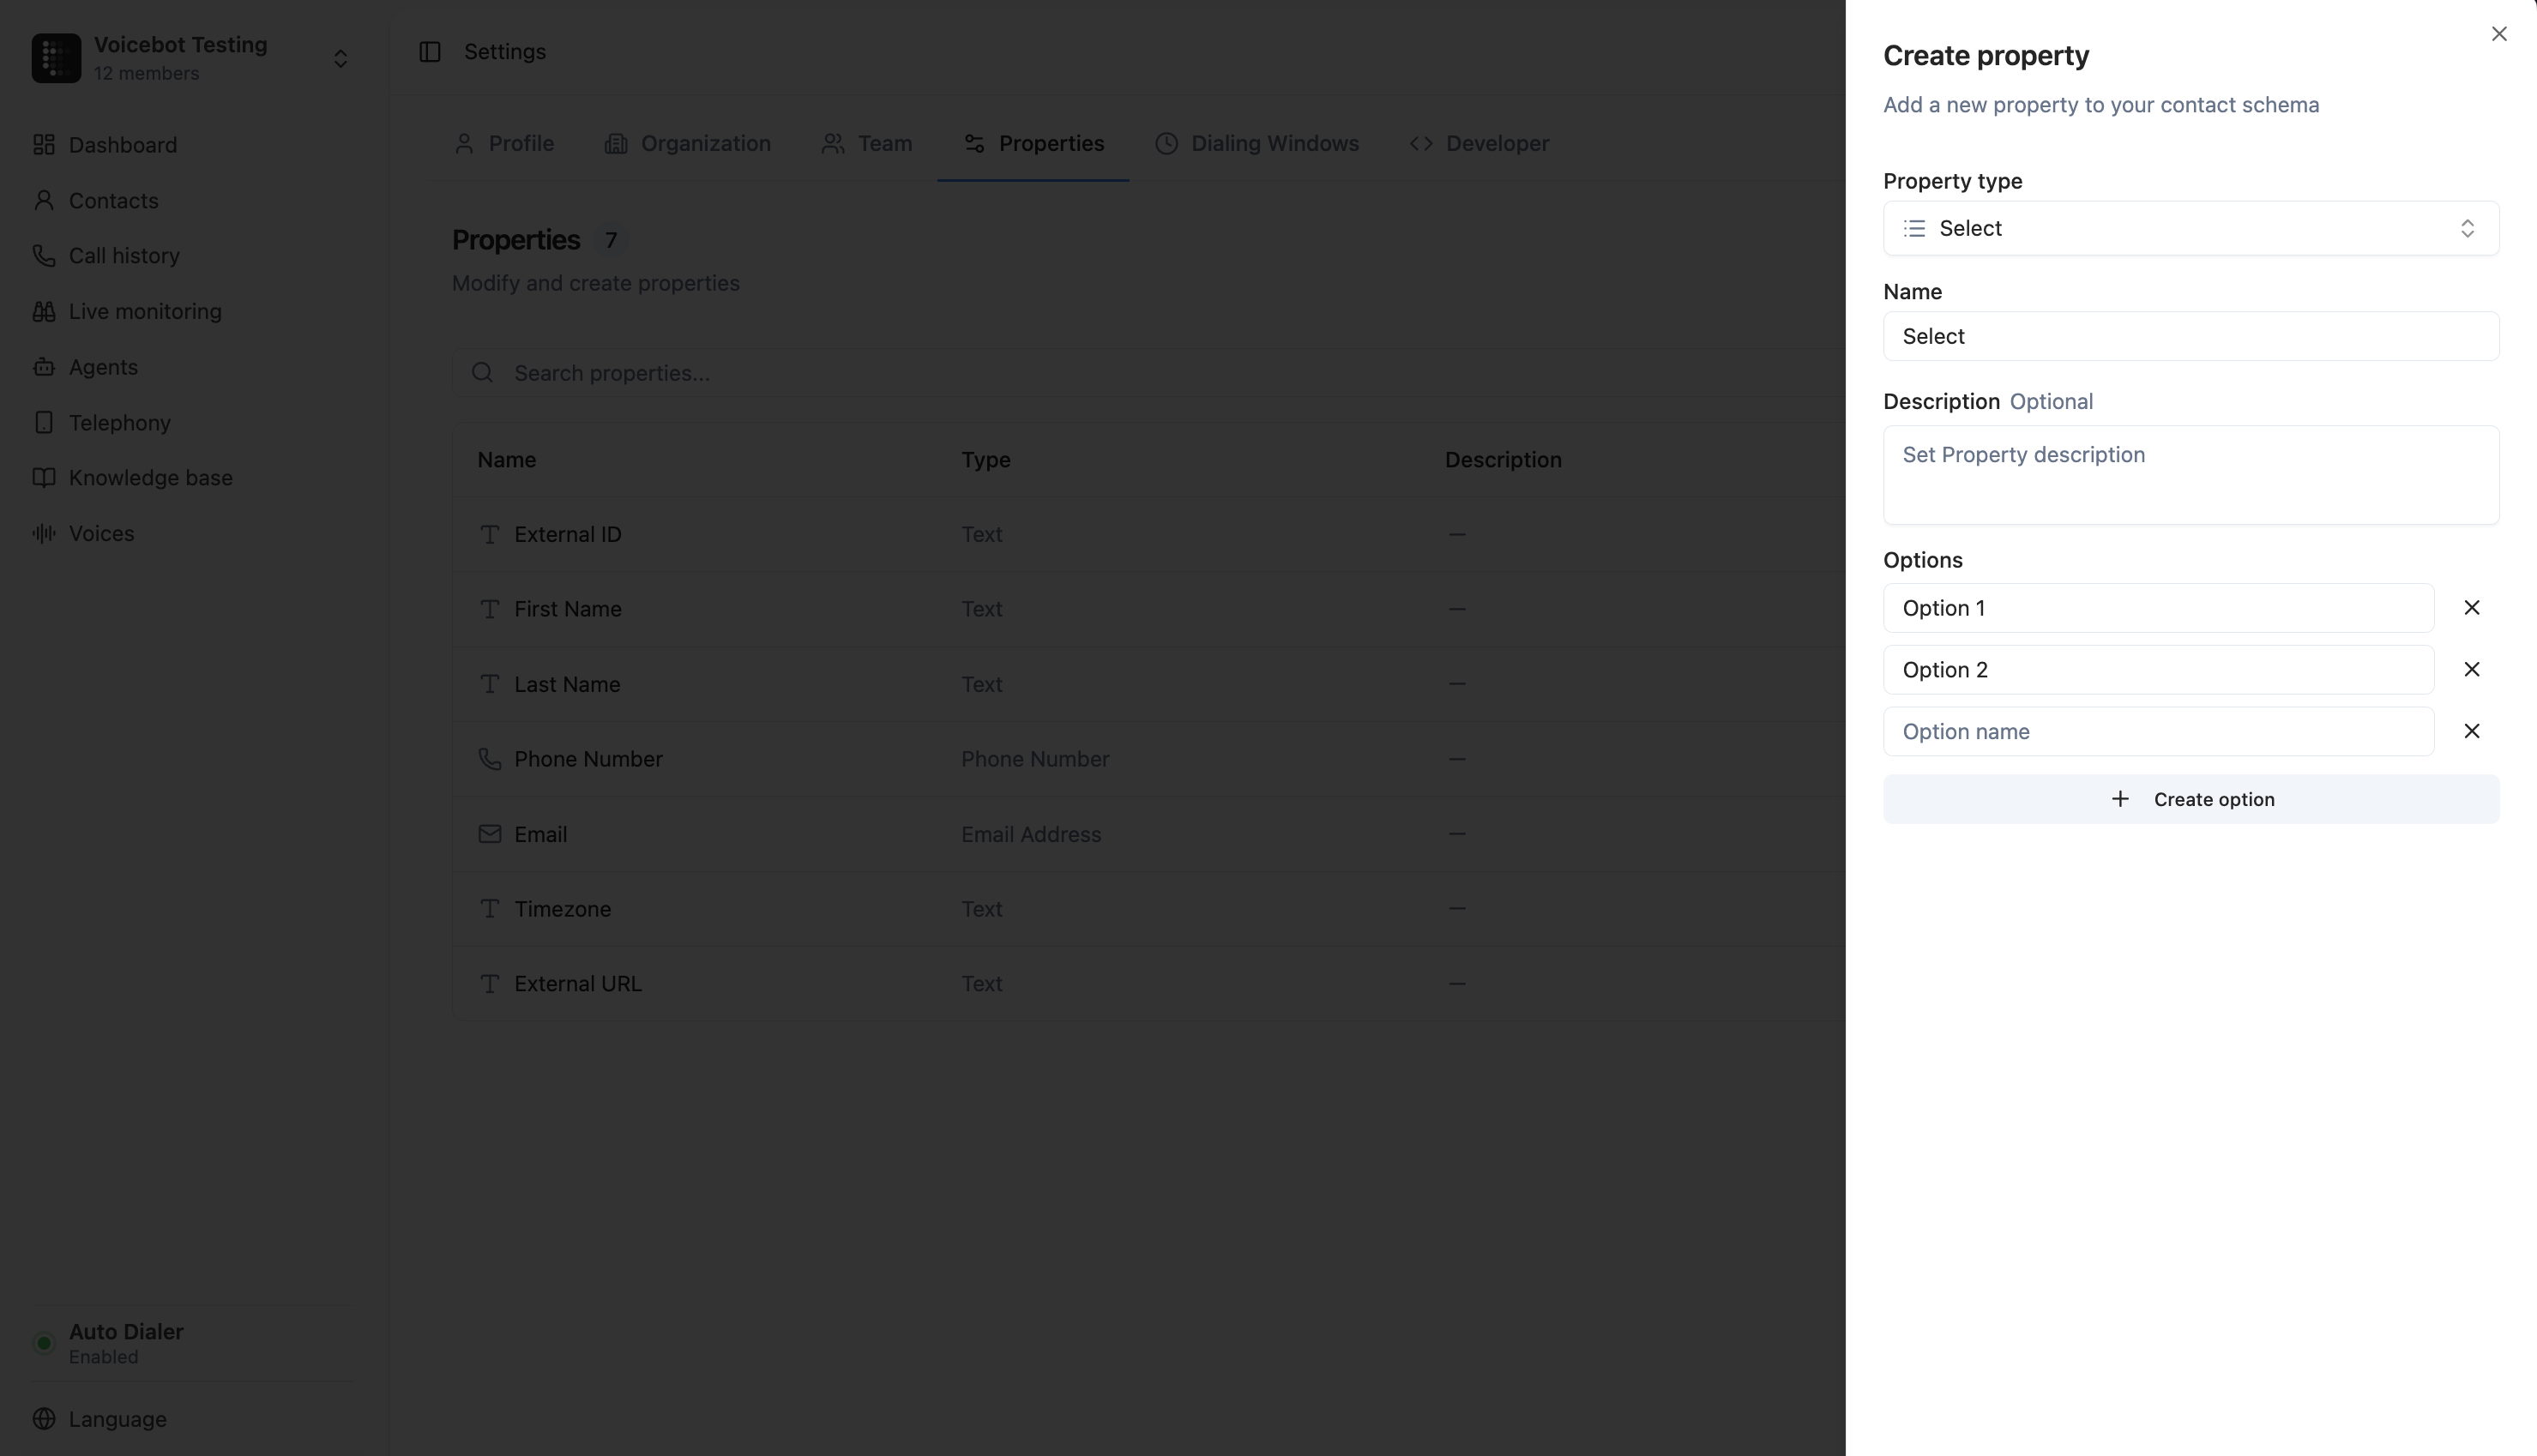
5. Save
Click Save and your new property is immediately available across all contacts.Editing Properties
You can edit an existing property at any time from the Properties tab in Settings. Click the menu icon next to any property and select Edit. You can change the name and description of any property. For Select and Multi-Select properties, you can also add new options.Important limitations when editing
- You cannot change the property type after creation. If you need a different type, create a new property and delete the old one
- You cannot remove existing options from Select or Multi-Select properties. This protects contacts that already have those values assigned. You can only add new options
Deleting Properties
To delete a property, click the menu icon next to it and select Delete. You’ll be asked to confirm.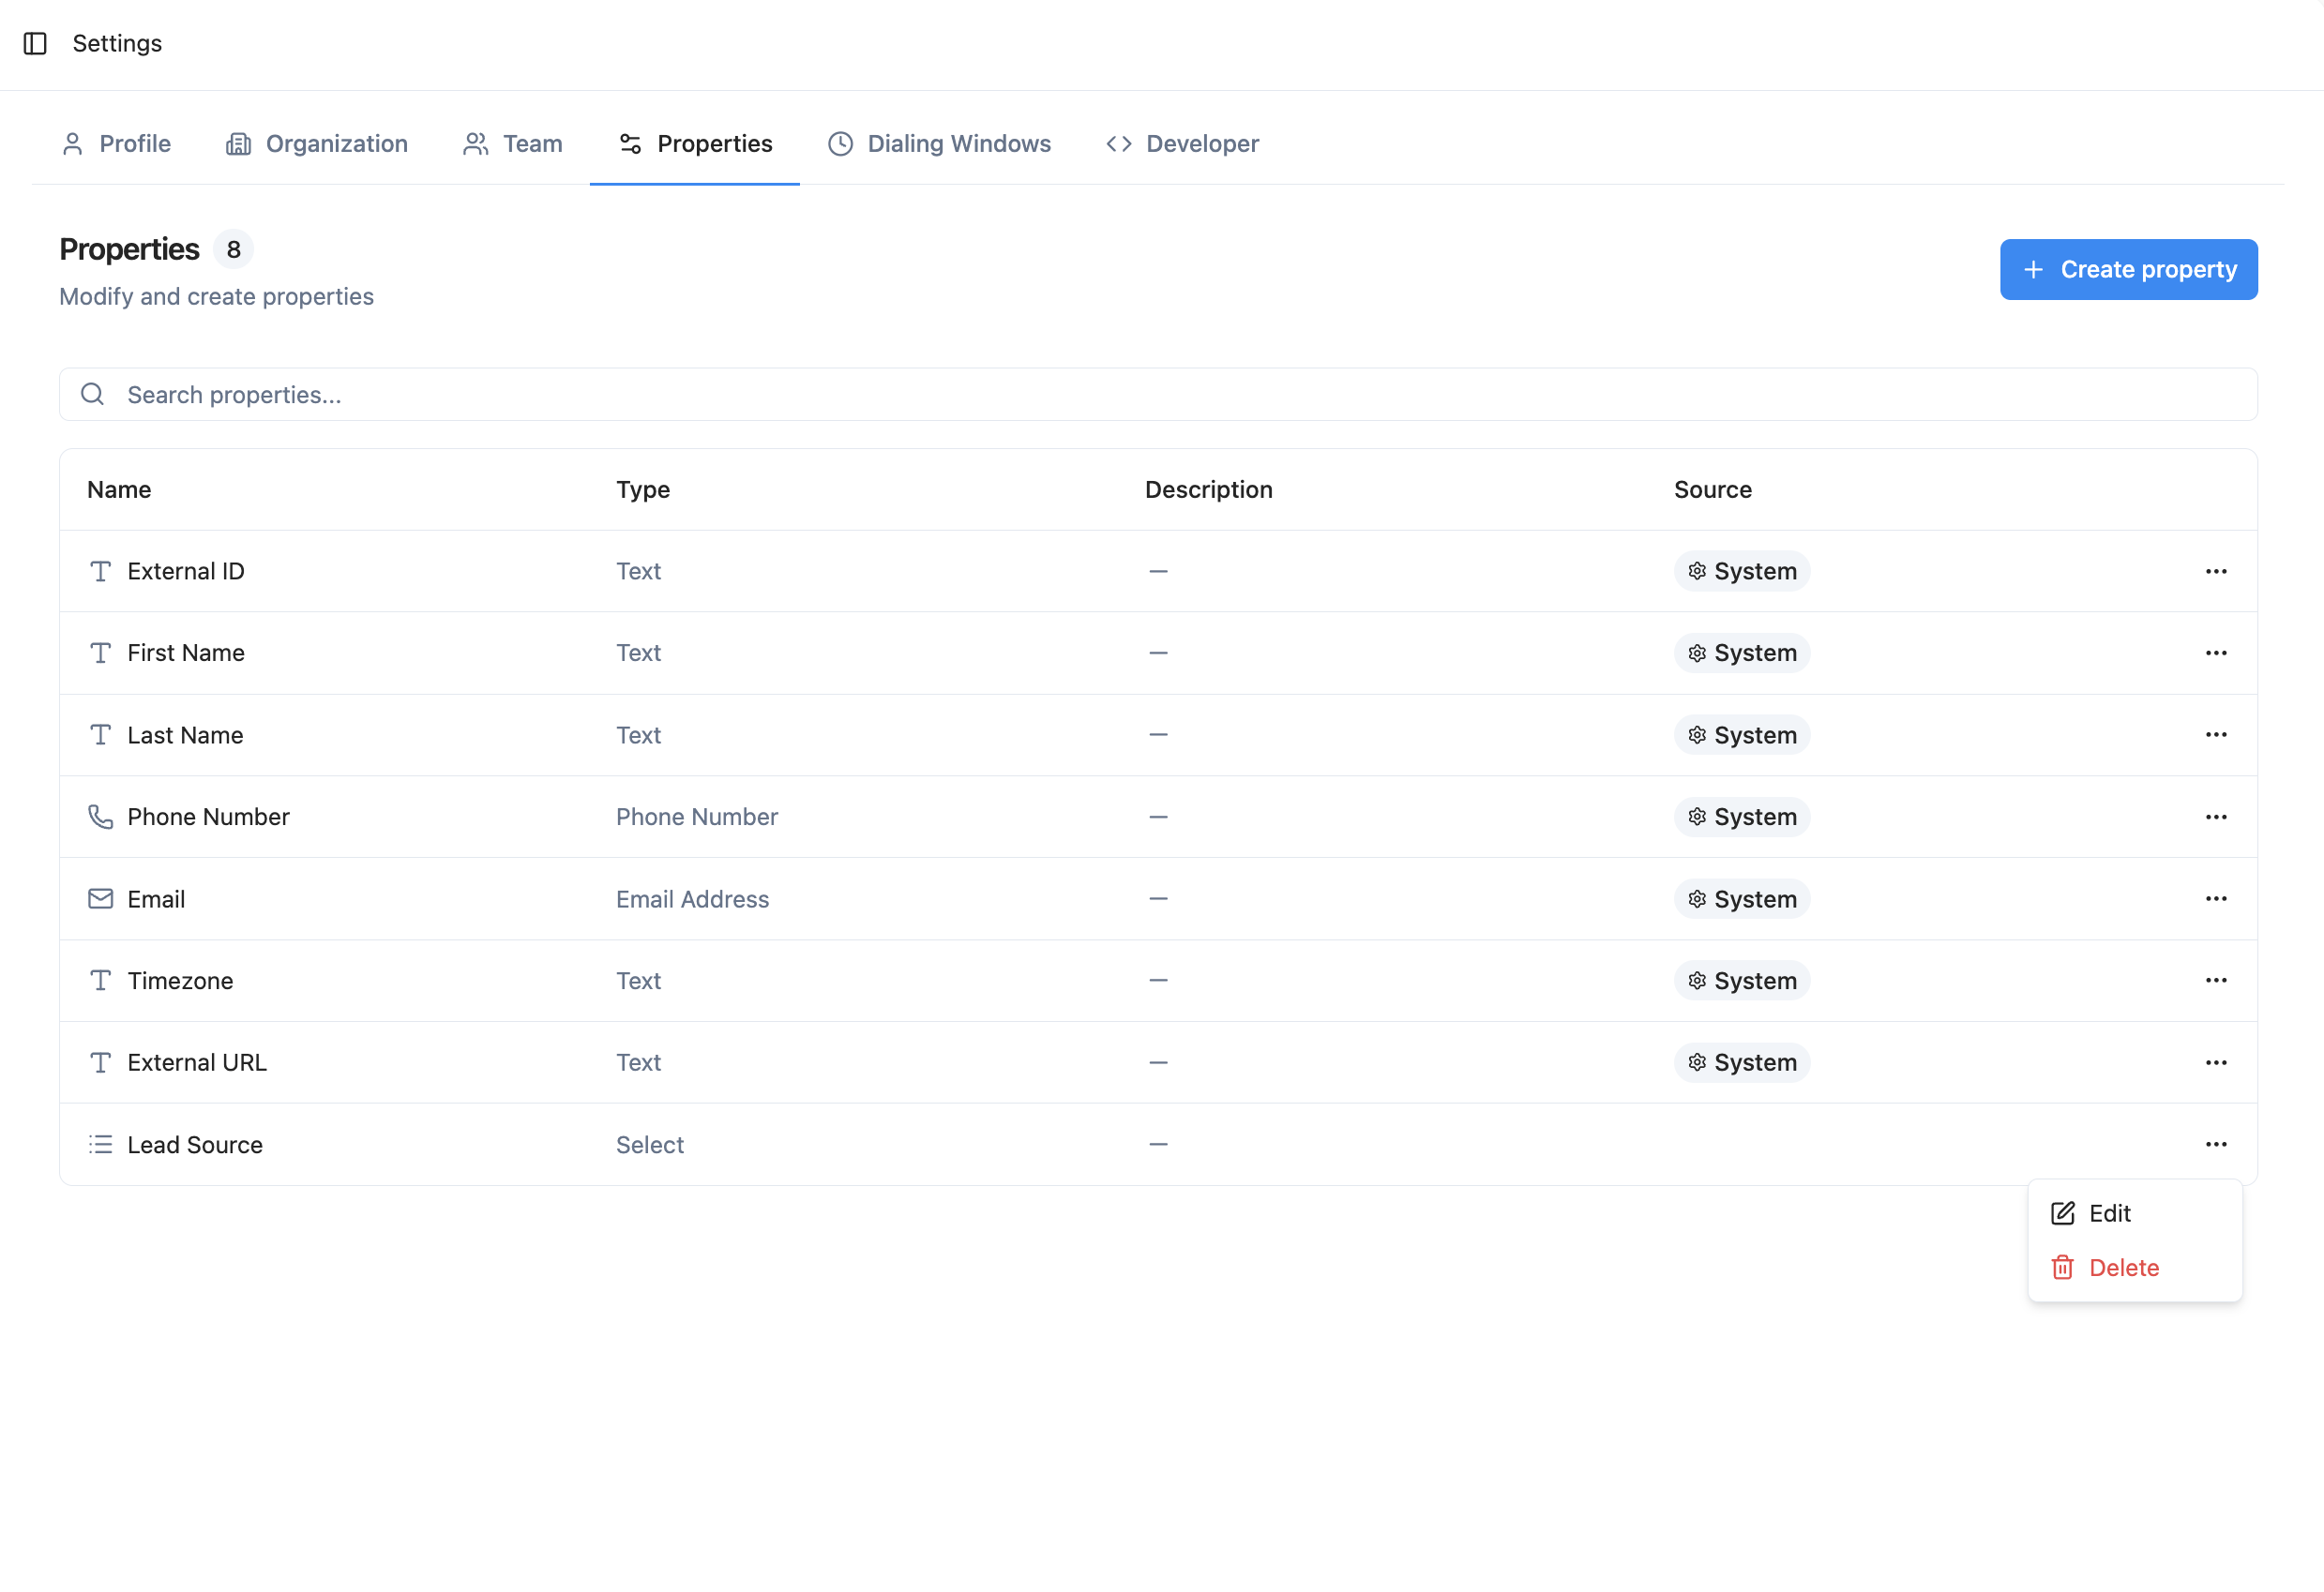
Warning: Deleting a property permanently removes it and its values from all contacts. This action cannot be undone.
Using Properties on Contacts
In the Contact Details Panel
When you open a contact, you’ll see your custom properties listed under the Custom Properties section. Each property renders with an appropriate input — a date picker for dates, a dropdown for select fields, checkboxes for multi-select, and so on.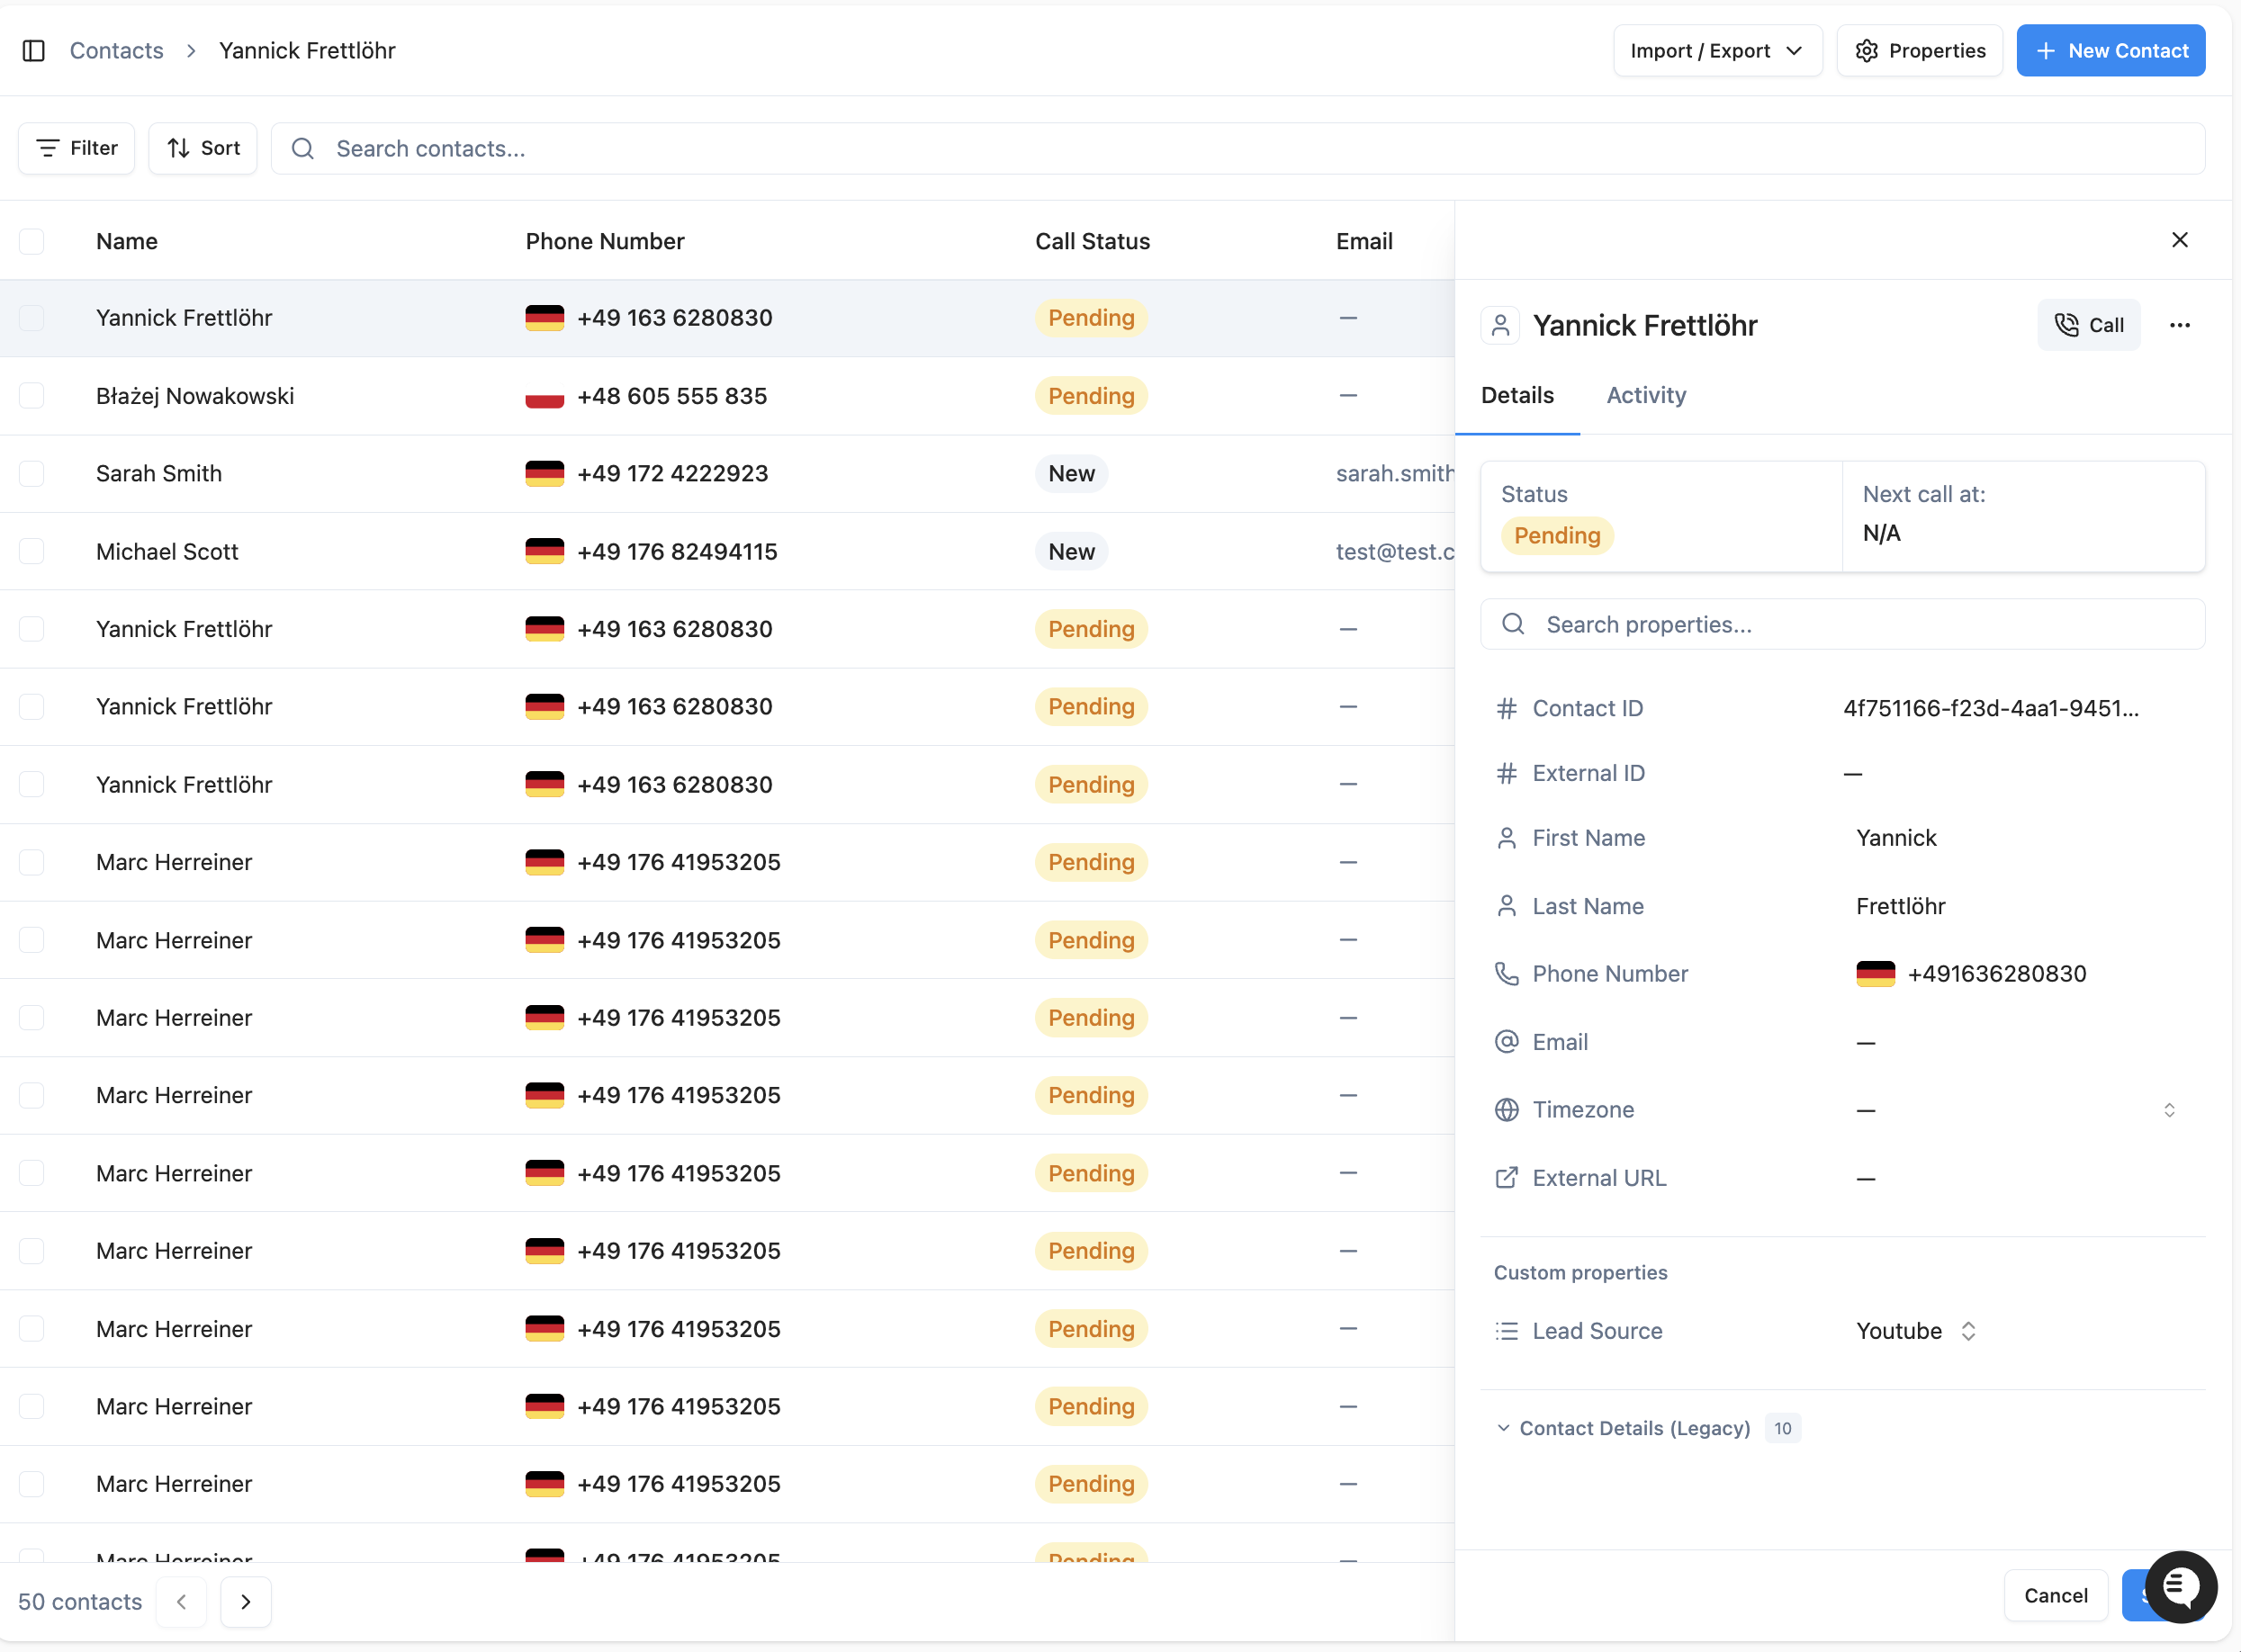
In the Contacts Table
You can show your custom properties as columns in the contacts table. Click the column picker icon to toggle which properties are visible.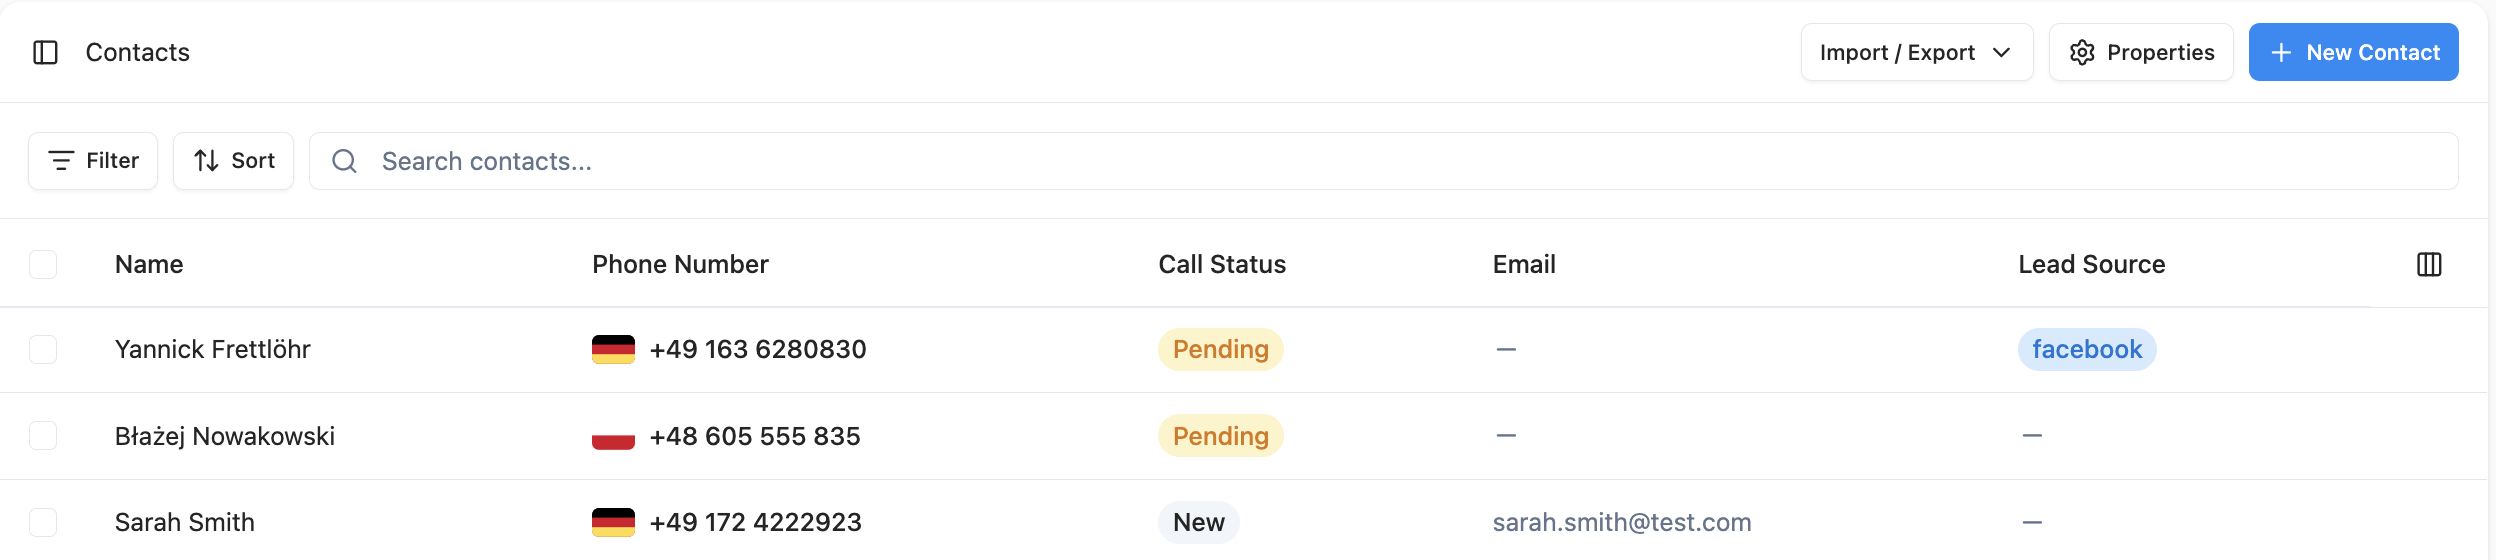
In Agent Prompts
You can reference contact properties inside your agent’s prompt so the AI personalizes its conversation based on each contact’s data. This is done through the Variables panel in the Agent Builder.The Variables Tab
When editing an agent prompt in the Agent Builder, expand the Variables panel at the bottom of the editor. It shows three categories of variables you can insert into your prompt:| Category | Description |
|---|---|
| Custom variables | Variables you define yourself — useful for values you want to set per agent |
| Contact properties | Your custom contact properties, automatically available as variables |
| Read only | System variables like currentDate, firstName, or callDirection |
Referencing Variables in the Prompt
Variables use the{{variableName}} syntax. When you type {{ in the prompt editor, an autocomplete dropdown appears with all available variables grouped by category. Select a variable to insert it as a styled chip in the editor.
For example, a prompt might look like:
How It Works at Runtime
When a call starts, telli replaces each{{variable}} with the actual value from the contact’s data. If a contact has “Loyalty Tier” set to “Gold”, the agent receives a prompt with that value filled in. Variables that don’t have a value for a given contact are removed from the prompt automatically.
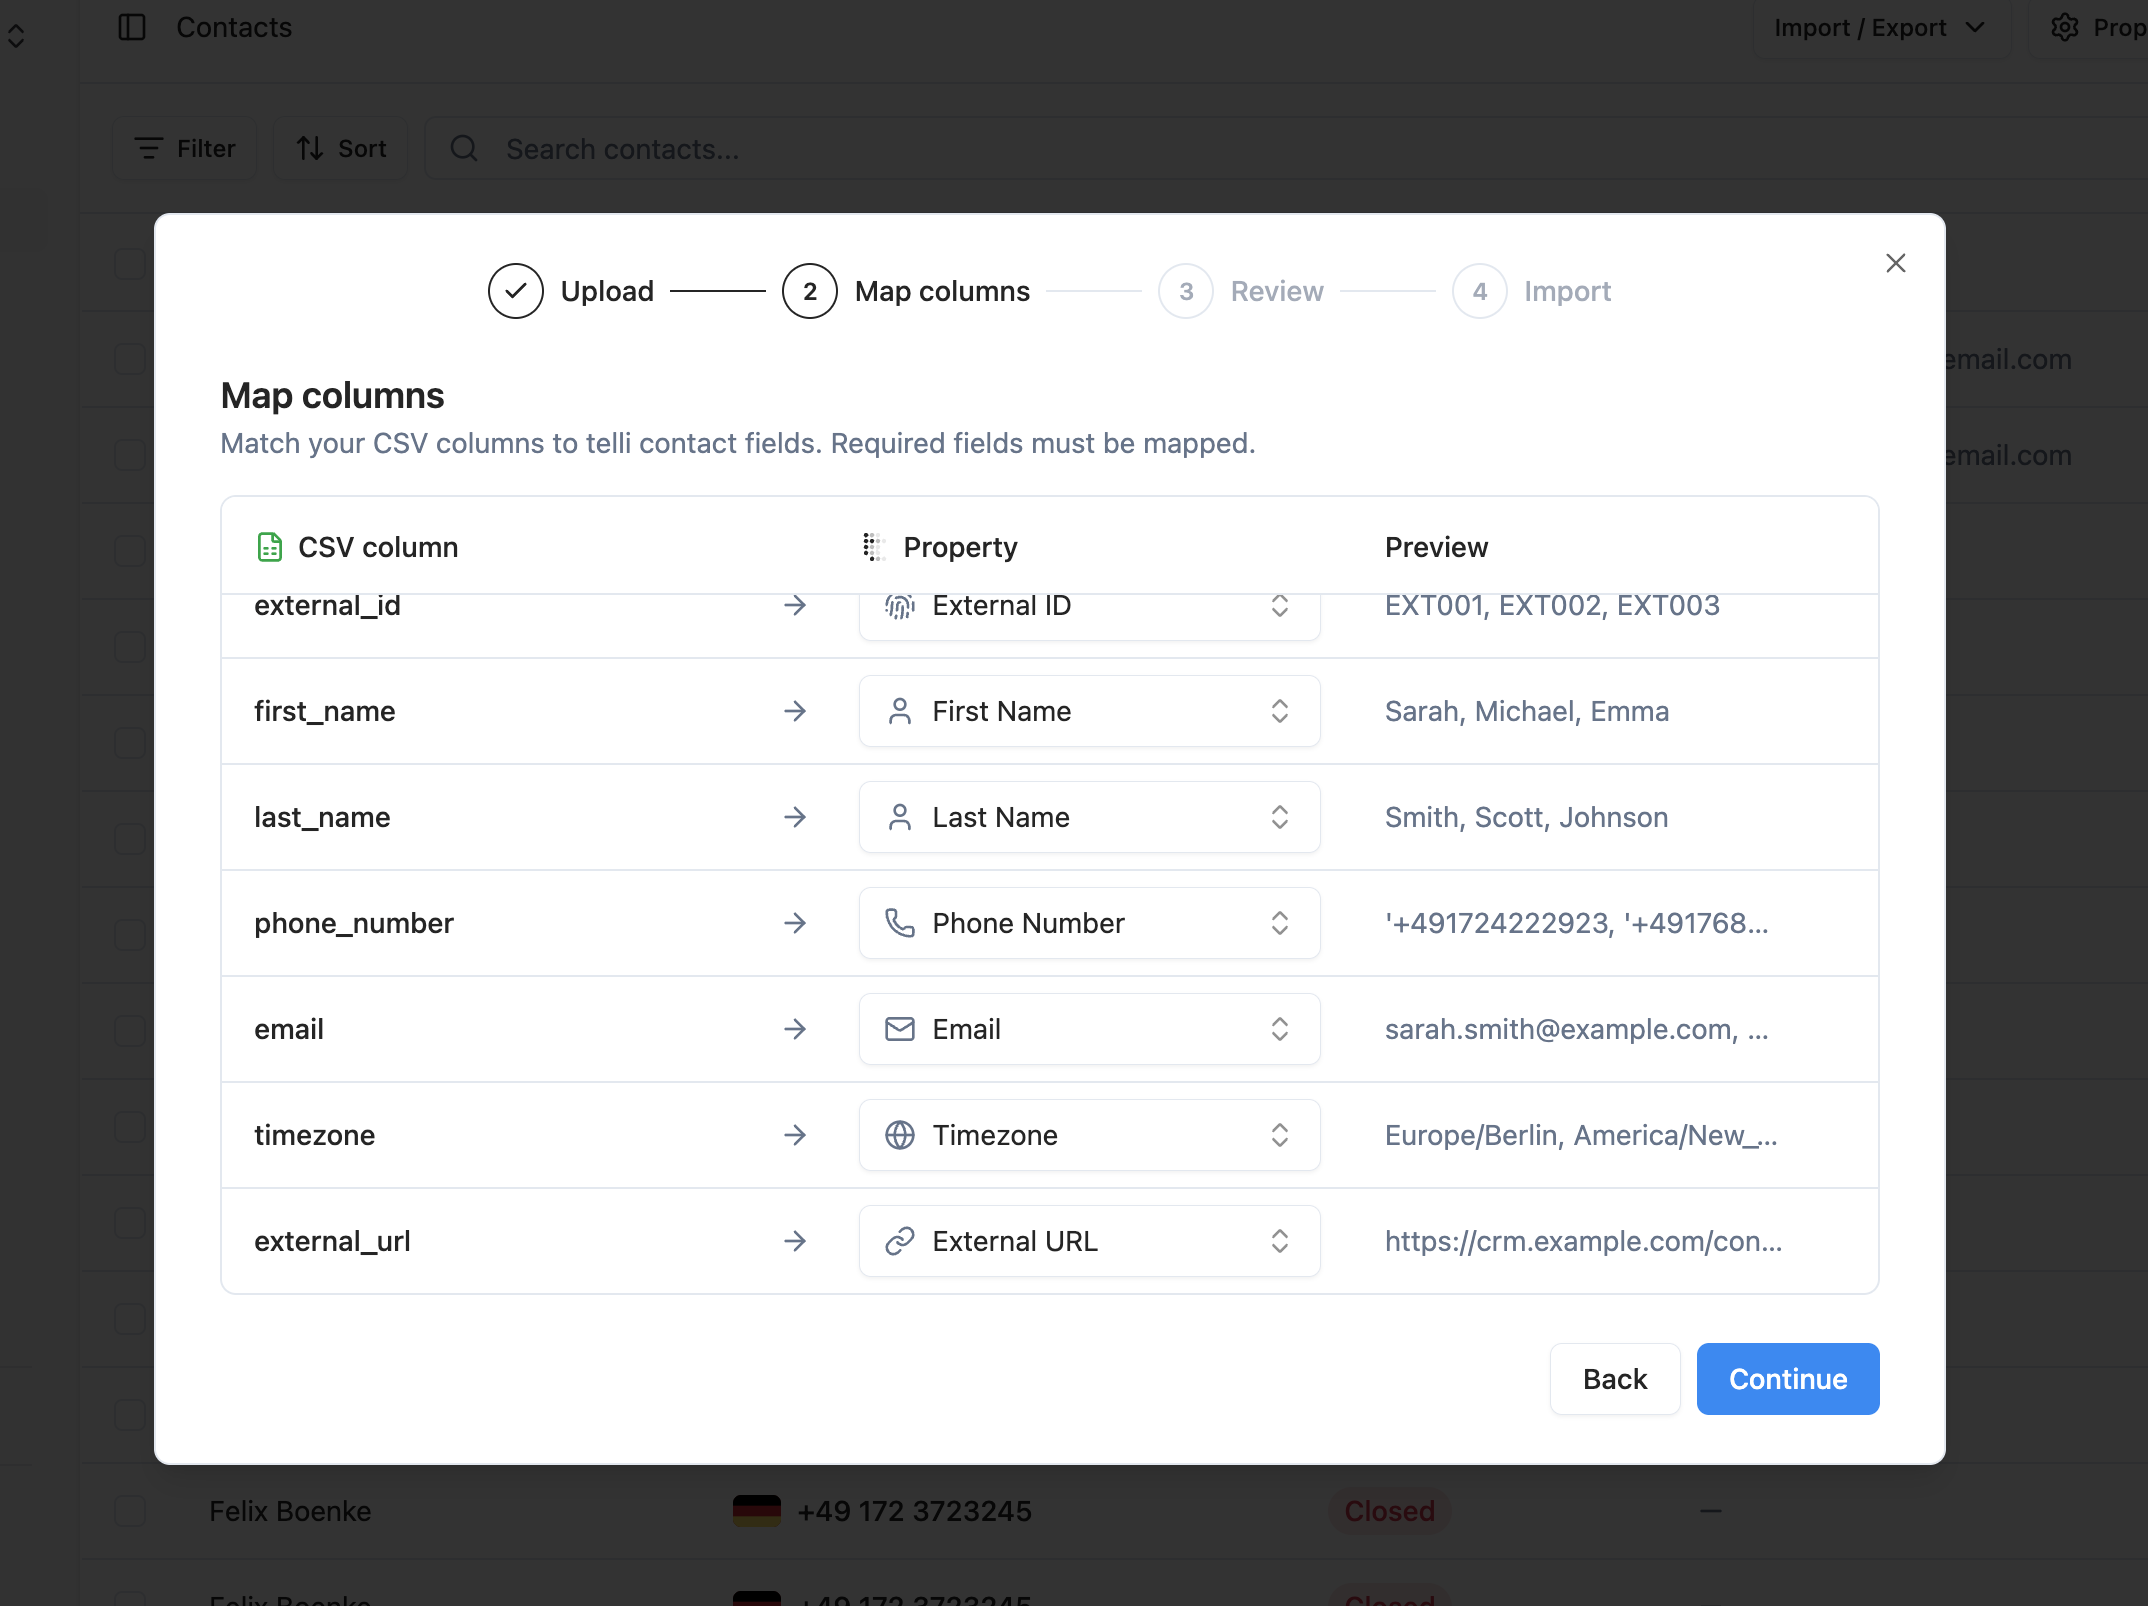
Properties in CSV Import
When you import contacts via CSV, you can map CSV columns directly to your custom properties.Automatic Mapping
telli automatically detects properties by key, label, or theLabel (key) header format used in the CSV template.
Manual Mapping
During import, you can map any CSV column to an existing custom property or create a new one directly in the wizard. In the import wizard, you can create these property types:- Text
- Number
- Boolean
- Date
- Date & Time
- Phone Number
System Properties vs. Custom Properties
telli distinguishes between two kinds of properties:| System Properties | Custom Properties | |
|---|---|---|
| Examples | First Name, Last Name, Phone Number, Email | Lead Source, Contract Date, Language |
| Who defines them | Built into telli | Created by you |
| Can be edited | Values can be edited | Values and definitions can be edited |
| Can be deleted | No | Yes |
Current Limits
| Resource | Limit |
|---|---|
| Property types available | 9 (Text, Number, Boolean, Date, Date & Time, Select, Multi-Select, Phone Number, Email) |
| Options per Select/Multi-Select | Unlimited (append-only — existing options cannot be removed) |
| Property type changes | Not supported after creation |
Note: These limits may change as we continue to improve the platform.
💡 Pro tip: Start by defining properties for the data your agents reference most during calls — things like customer tier, contract type, or preferred language. Once defined, reference them in your agent prompt via the Variables panel in the Agent Builder to deliver personalized conversations automatically.